Boomi: Integration for NetSuite and Salesforce
Overview
Salesforce (a robust CRM) and NetSuite (a leading ERP system) work together to streamline communication and workflows across your organization. Moreover, NetSuite and Salesforce can create a single view of customer data and sales processes. To enhance that workflow, Dell Boomi comes into the picture.
The software provides a visual designer and a library of pre-built connections and templates to simplify integration on the respective platform. The platform also offers numerous monitoring and reporting capabilities to track the integration process’s performance. This blog highlights how to execute Salesforce Integration with Netsuite. We will also discuss implementing NetSuite customers into Salesforce accounts utilizing Dell Boomi as an integration tool.
Step-by-Step Guide on Salesforce Integration with NetSuite Using Boomi
In this tutorial, we will understand Salesforce integration with Netsuite using Boomi step-by-step for better understanding.
First, we must create a new Salesforce account from a NetSuite Customer. The step-by-step implementation process is below.
Note: Integrating data between disparate systems can avoid data quality problems and duplicate repetitive entries.
Creating Required NetSuite Credentials
Boomi utilizes NetSuite’s Token-based Authentication (TBA) features that connect it with their API.
To begin in Salesforce to Netsuite integration, you will require NetSuite Credentials for the initial connection:
- Application ID
- Account ID
- Token ID
- Token secret
- Consumer key
- Consumer secret
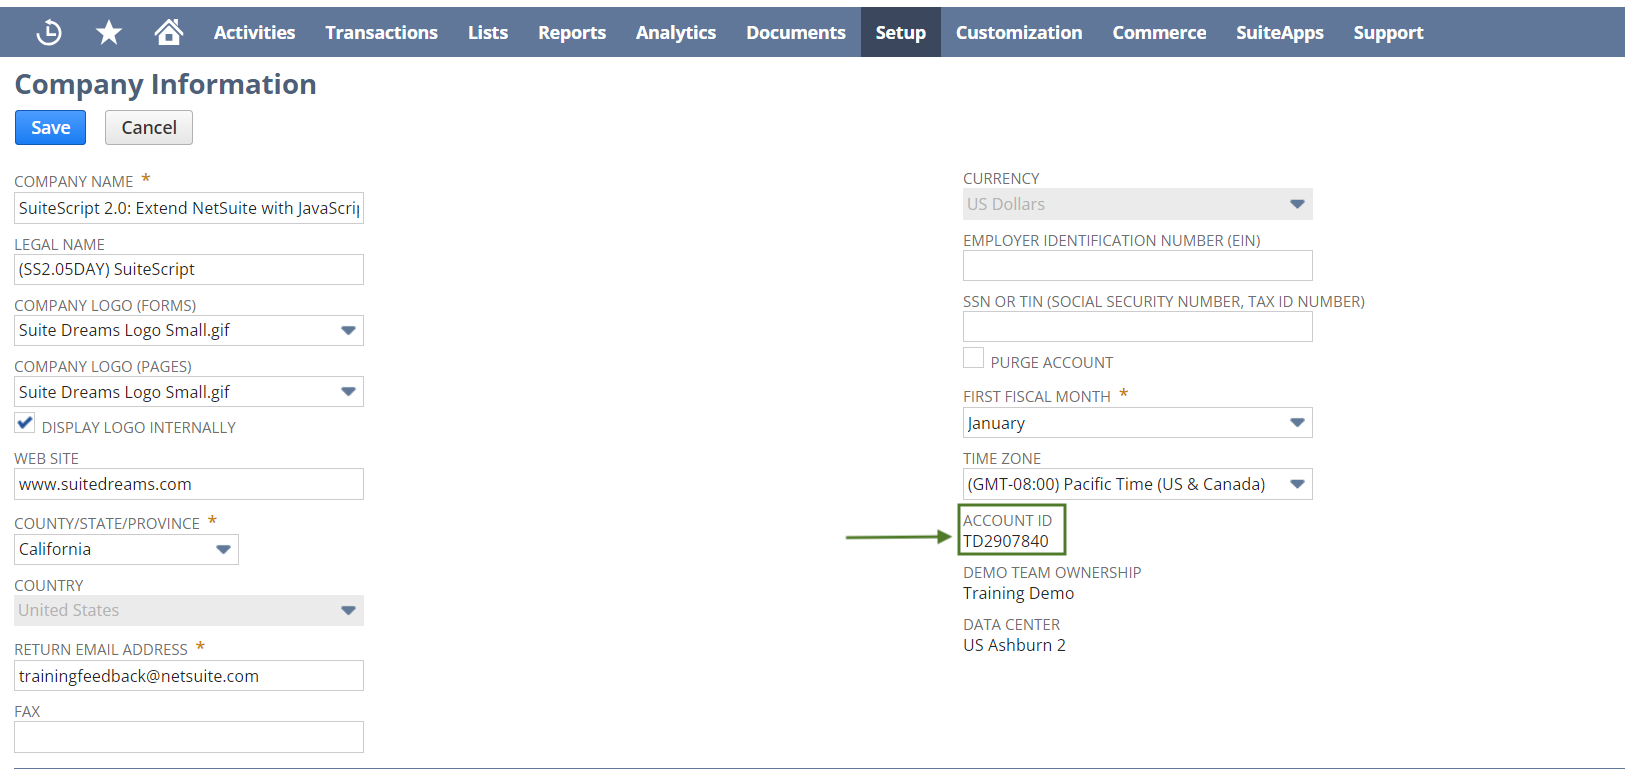
Step 1 – Get the Account ID
Step 2 – Creating an Integration Record for the Consumer Key and Consumer Secret
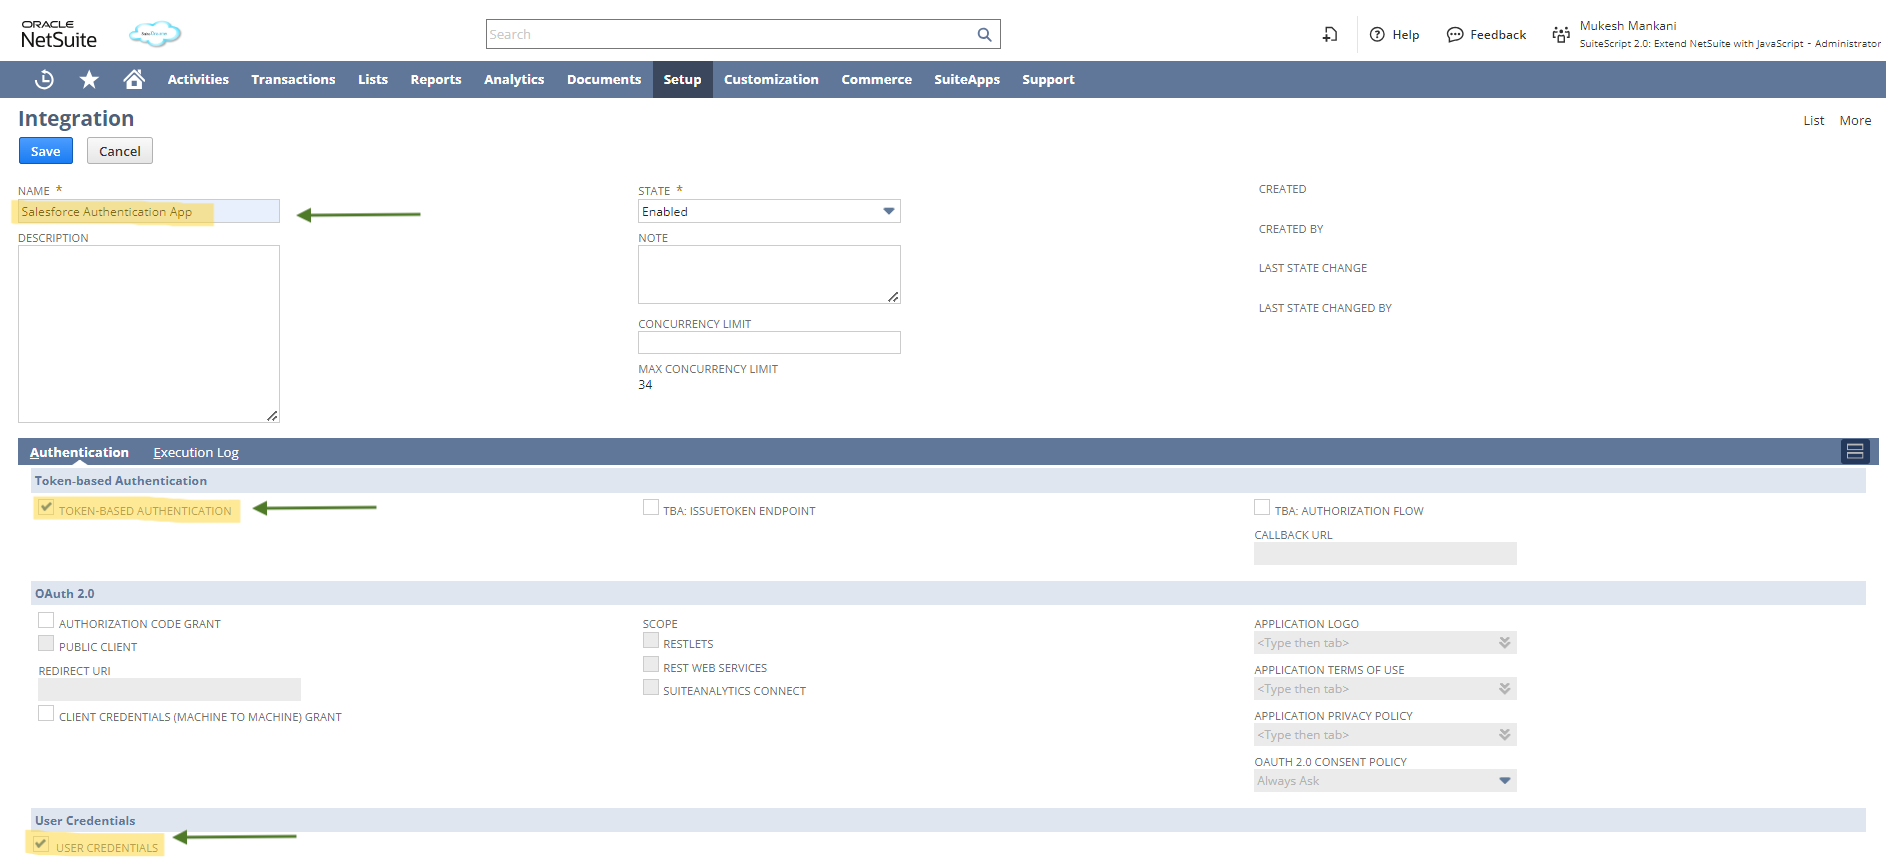
- First, go to Setup > Integration > Manage Integrations > New.
- Enter a name for your application and a description, if required. Thus, the following values should be checked for process verification:
- TOKEN-BASED AUTHENTICATION (TBA)
- USER CREDENTIALS
- The following values should be unchecked (these fields might not be visible to everyone)
- TBA: ISSUETOKEN AUTHENTICATION (*)
- AUTHORIZATION CODE GRANT
- TBA: AUTHORIZATION FLOW
- Next, keep the state set as per the default value.
- Click Save for Netsuite to Salesforce integration ( Also, sensitive data will be shown when clicked)
- Copy the Consumer Key and Consumer Secret, which will appear only once. If you drive away from the selected page, then you need to recreate the key and secret for Salesforce integration with NetSuite.
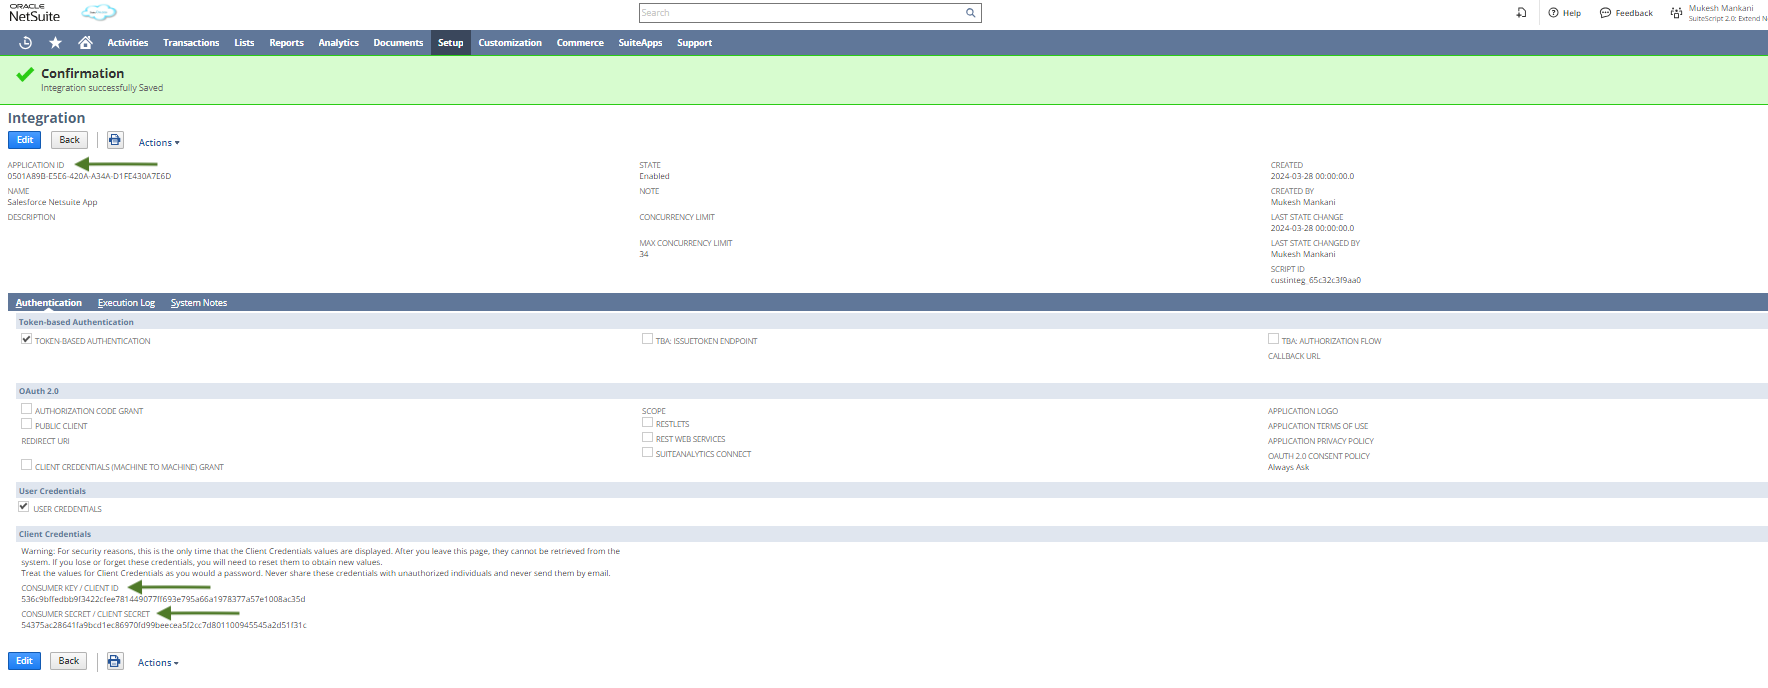
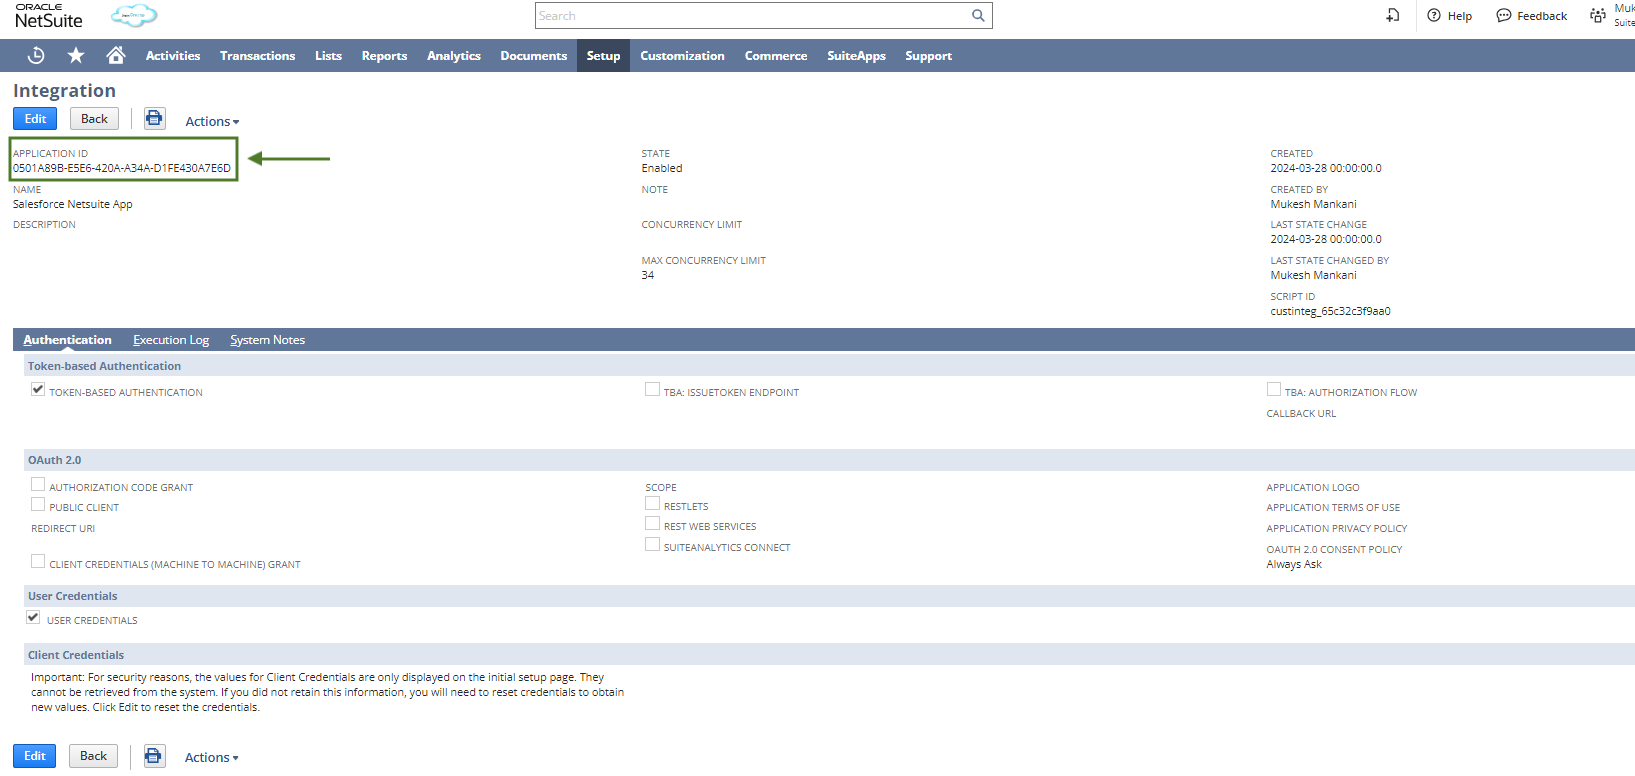
Step 3 – Get an Application ID for Salesforce with NetSuite Integration
- First, go to setup, click on integration, later manage Integrations, and then select App.
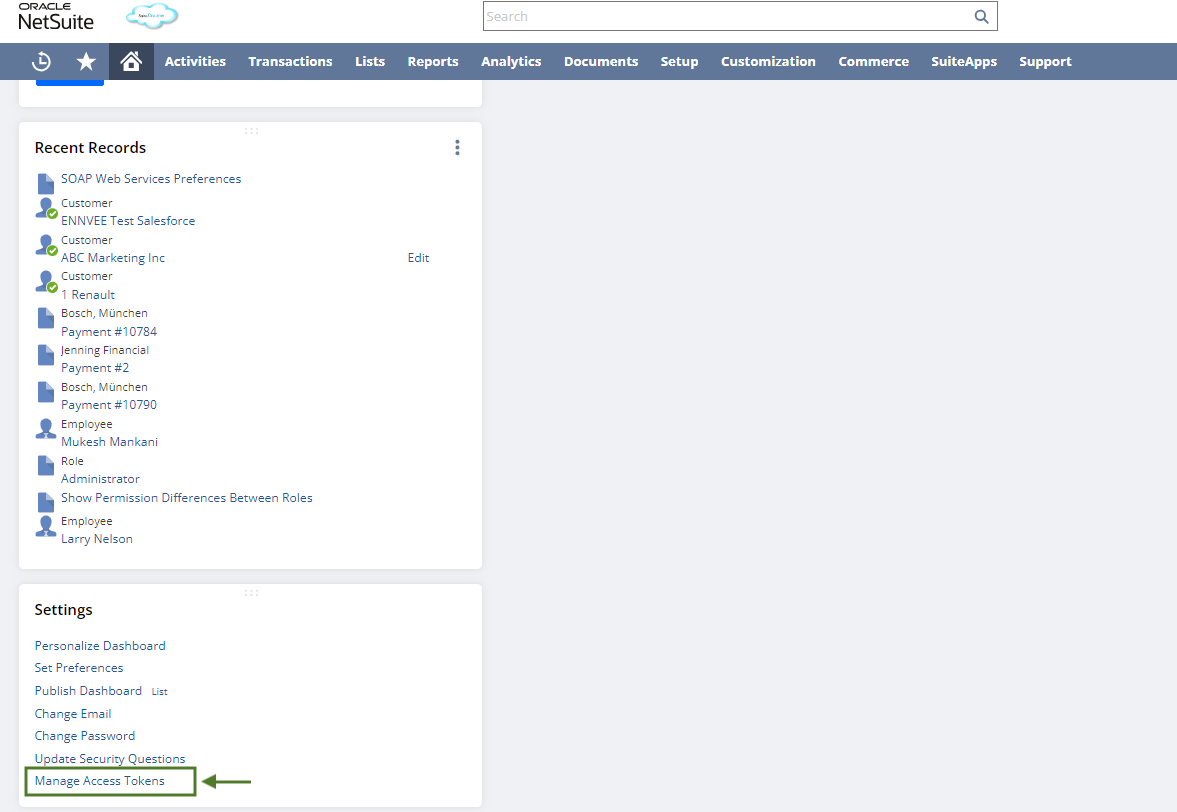
Step 4 – Generating an Access Token
- On the NetSuite Home page (indicated with a Home icon), there is a section called “Settings” in the lower-left corner. Towards the bottom of that, click “Manage Access Tokens”.
- Post that, click on the New My Access Token button.

- Next, on the Access Token page, you must select Application Name( mentioned in the integration record steps above).
- Last click on “Save”. (The sensitive data will appear)
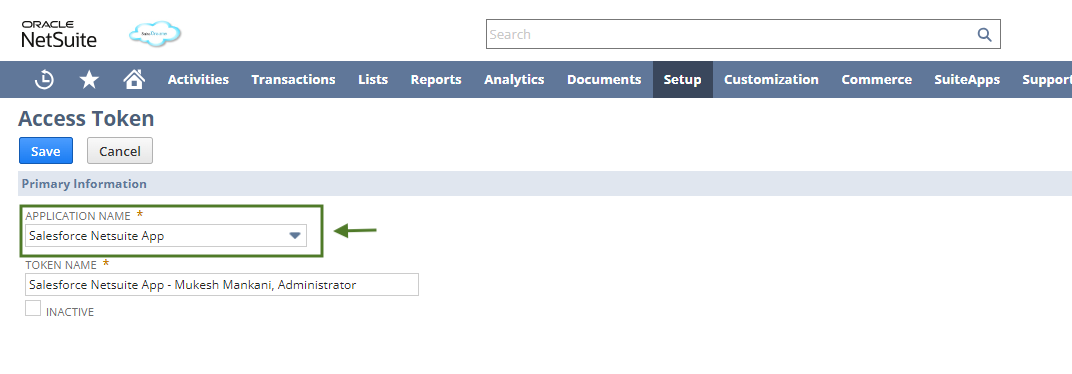
- Copy the Token ID and Token Secret, which will appear only once. If you navigate away from the page, you must recreate another access token.
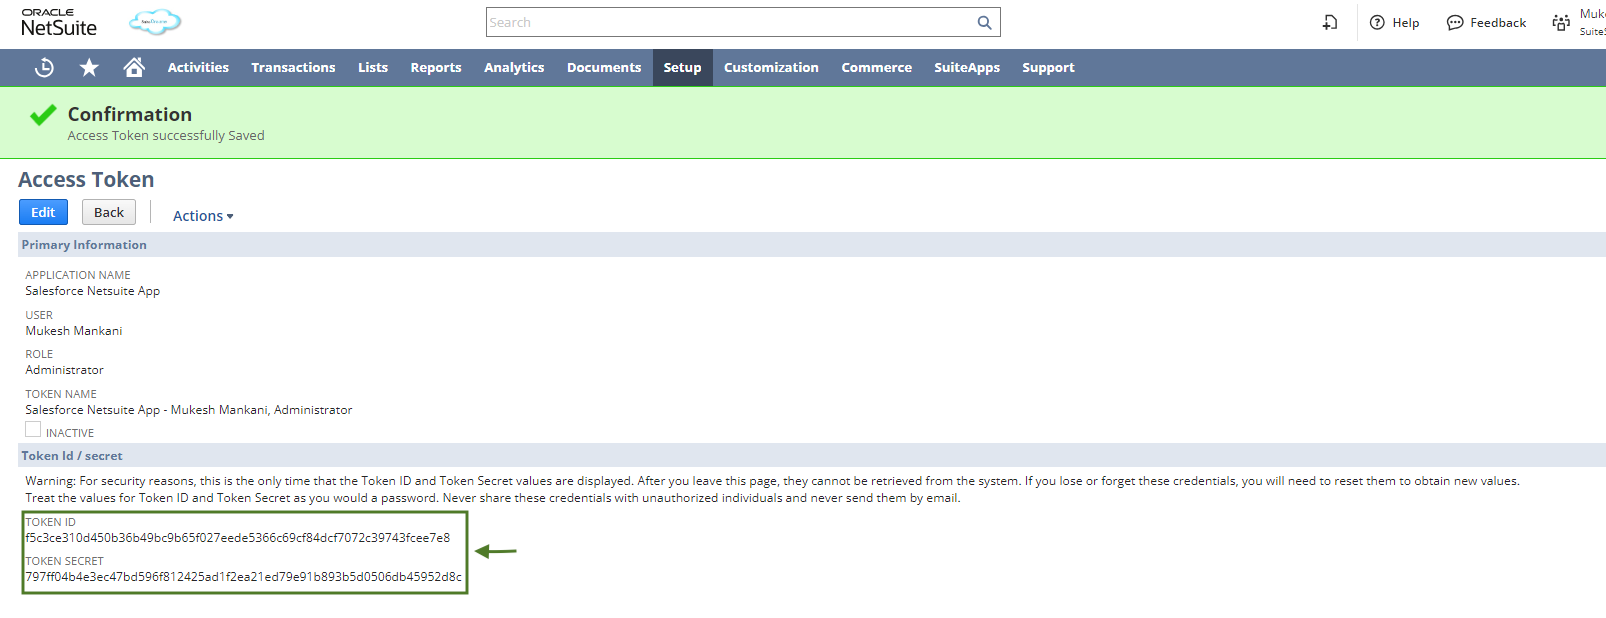
Note: Some selections in this guide may be available outside of NetSuite. Ensure all available settings are correct; some may need more time to locate.
Login to the Dell Boomi Account
Step 1 – Connect NetSuite to Salesforce
- Next, go to the Home page and click on Integration.

- Click on the Browse Process Library in the Boomi Window, then select the NetSuite to Salesforce Integration, and last installed it.
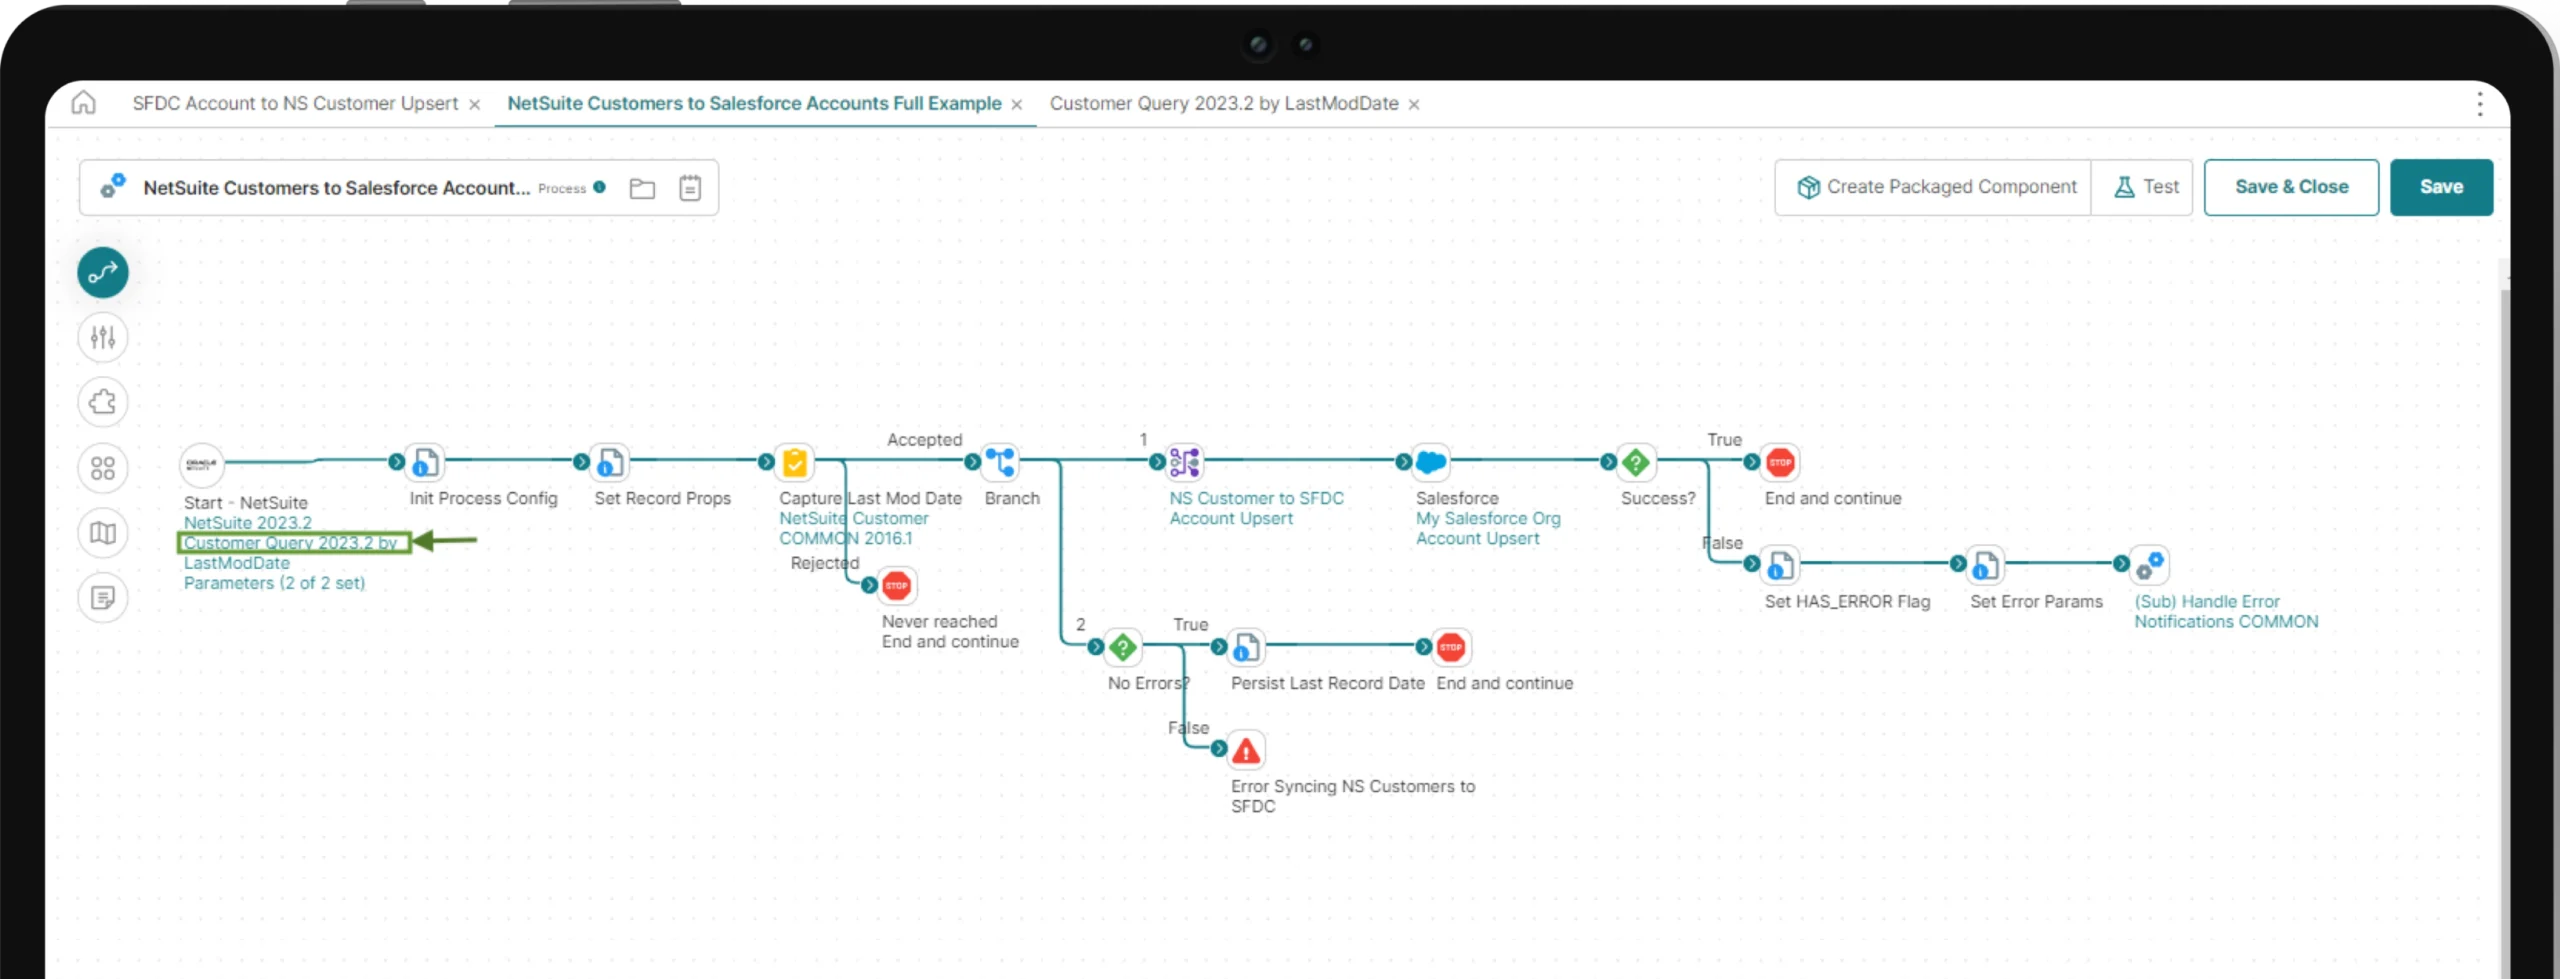
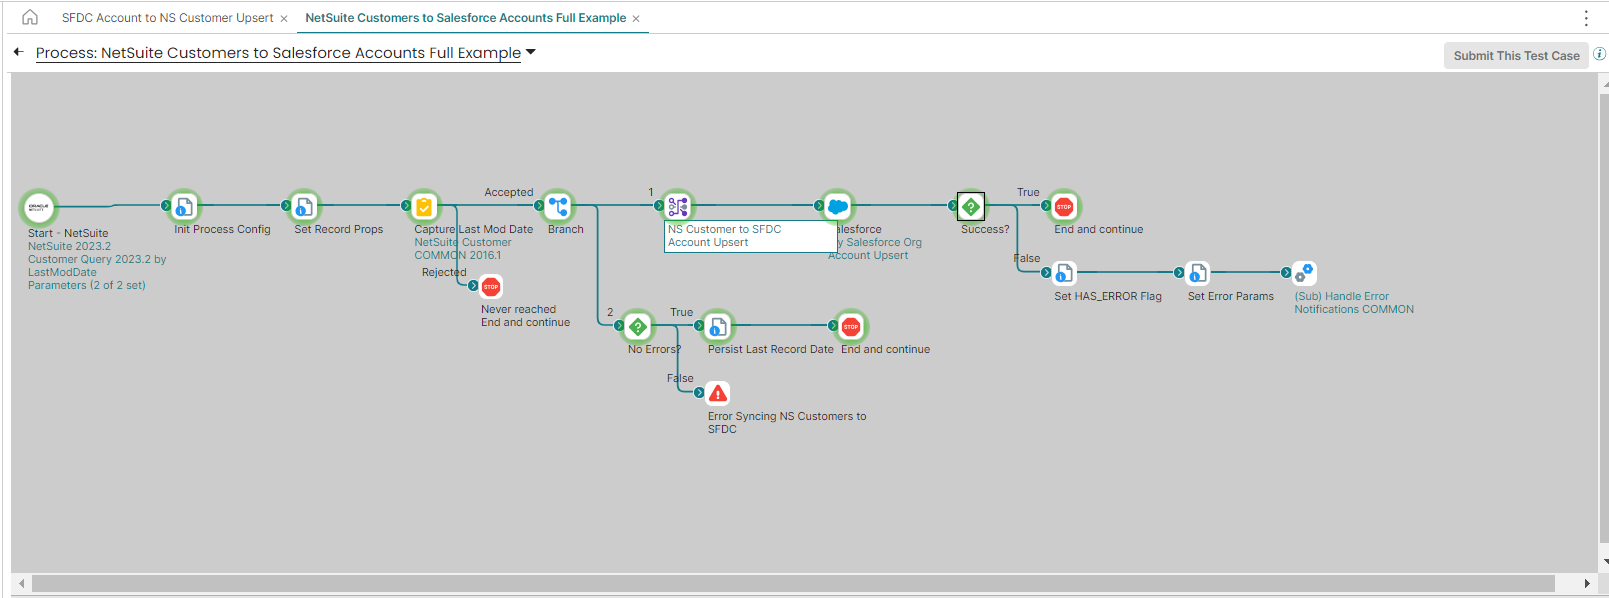
Step 2 – NetSuite to Salesforce Account Flow
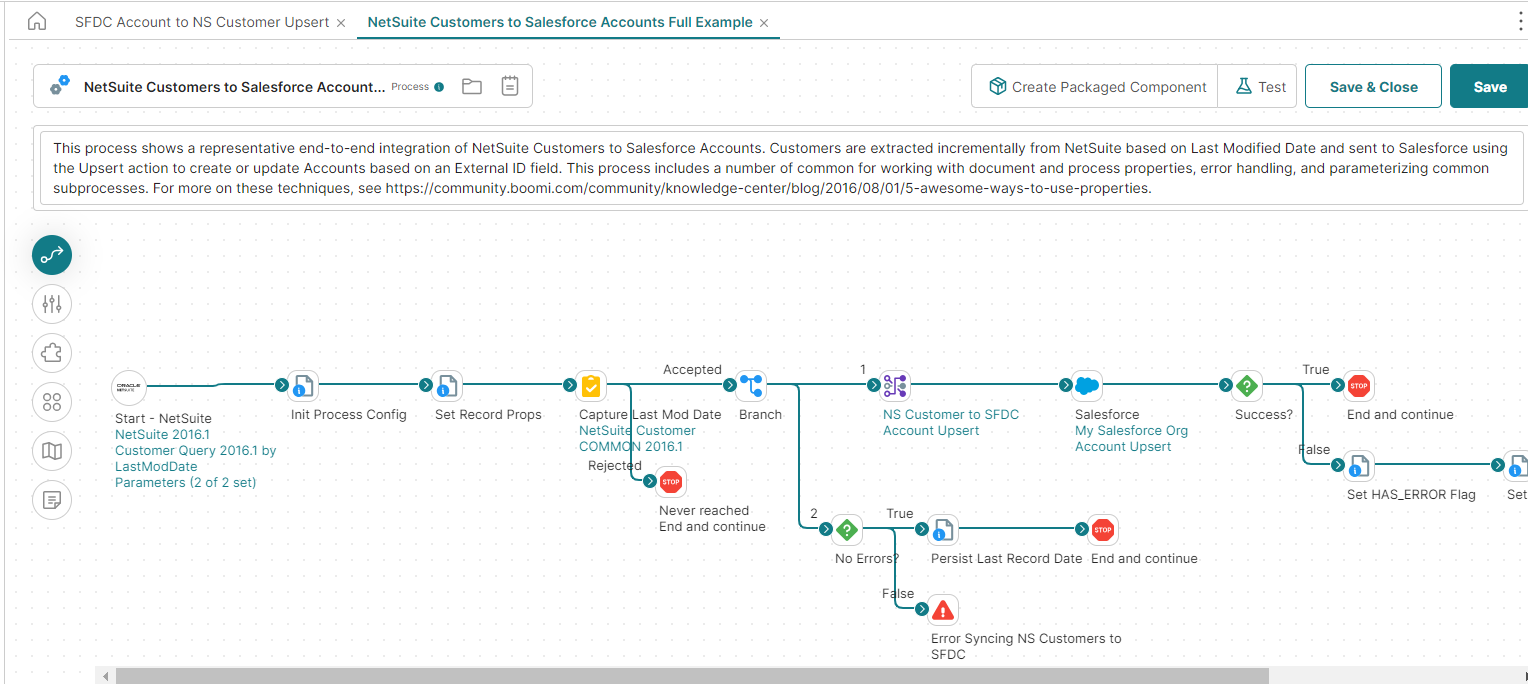
Step 3 – Configure of NetSuite Credential
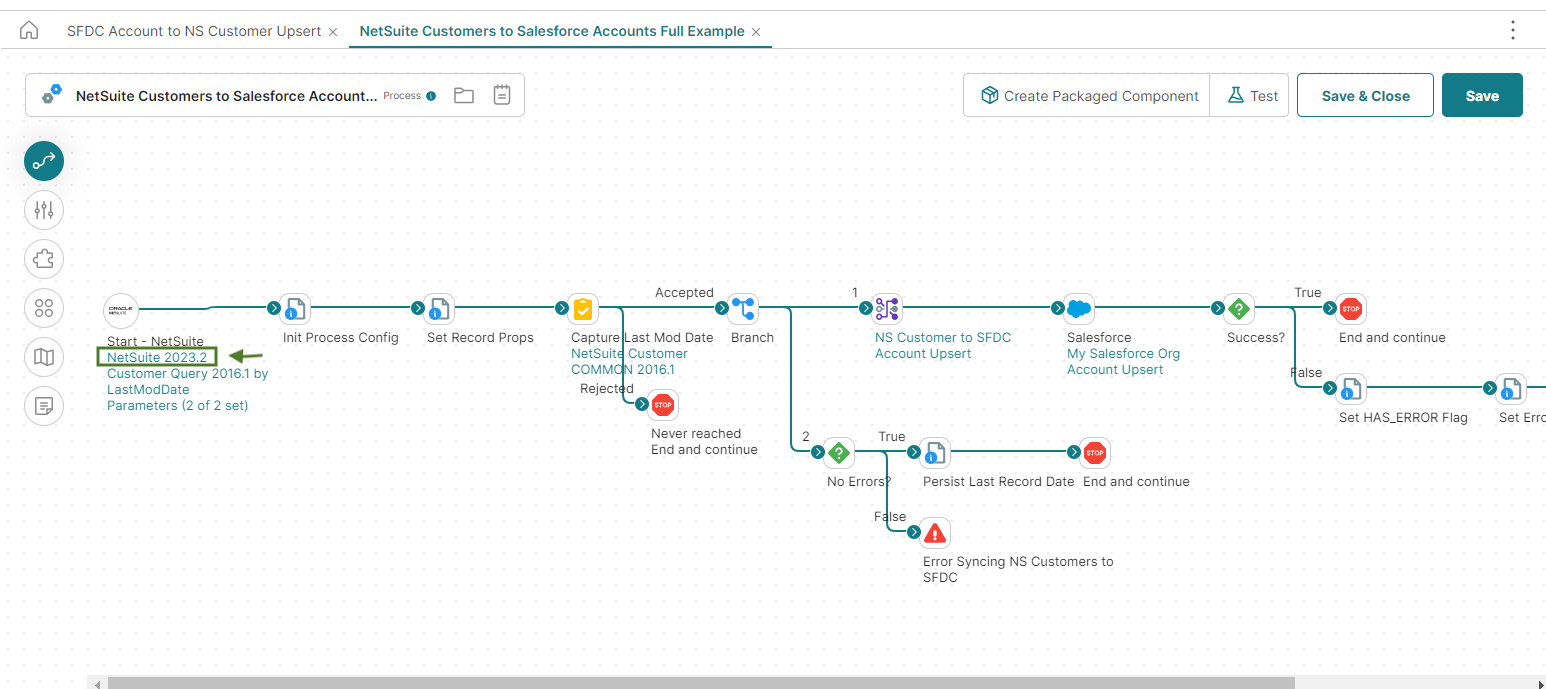
- Double-click on NetSuite 2023.2.
- Enter the User, Password, Account number, Consumer Key, Consumer Secret, Token ID, Token Secret, and Application ID. Lastly, you’re required to click on the “save” button.
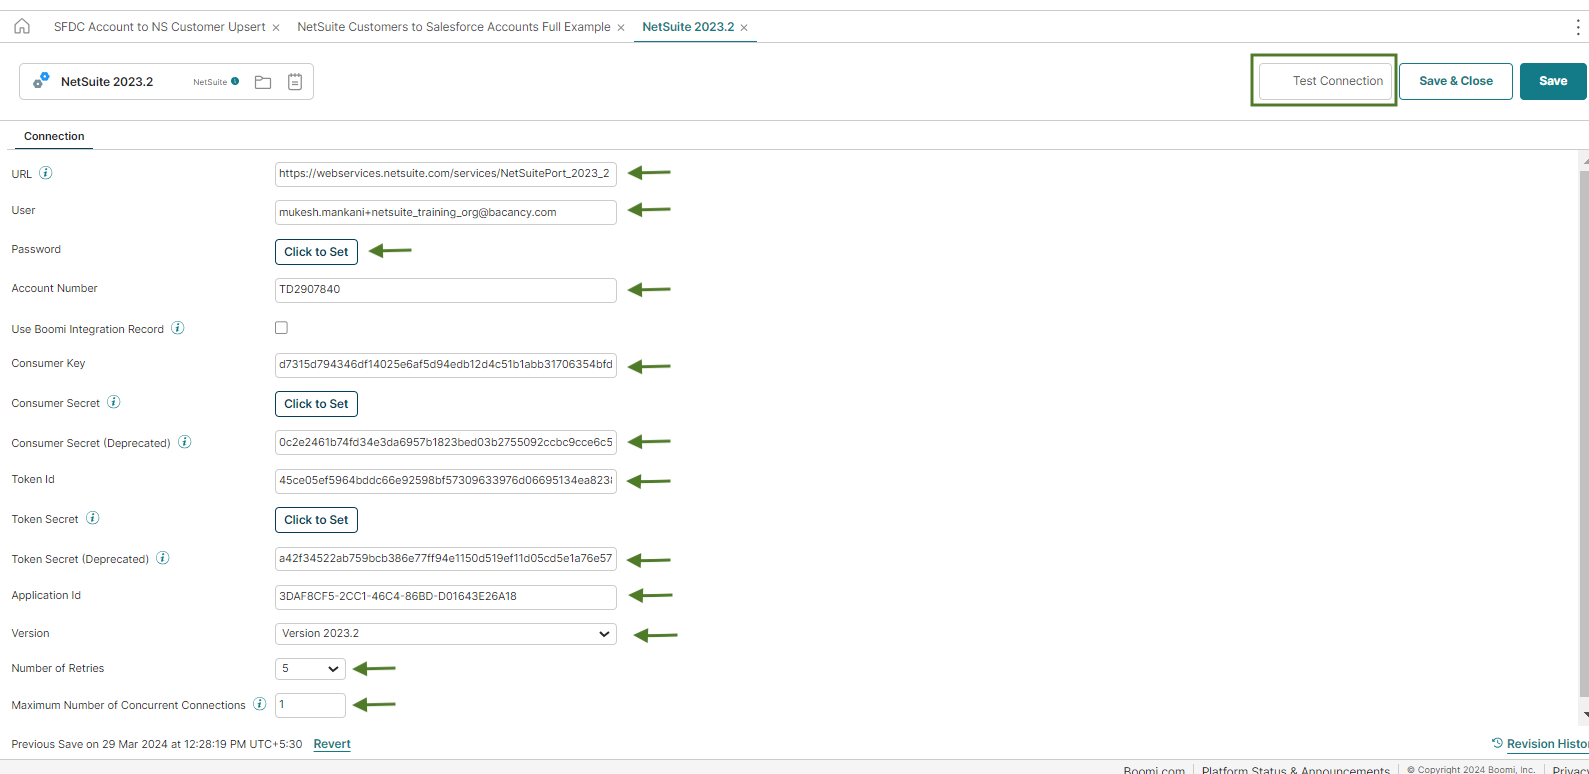
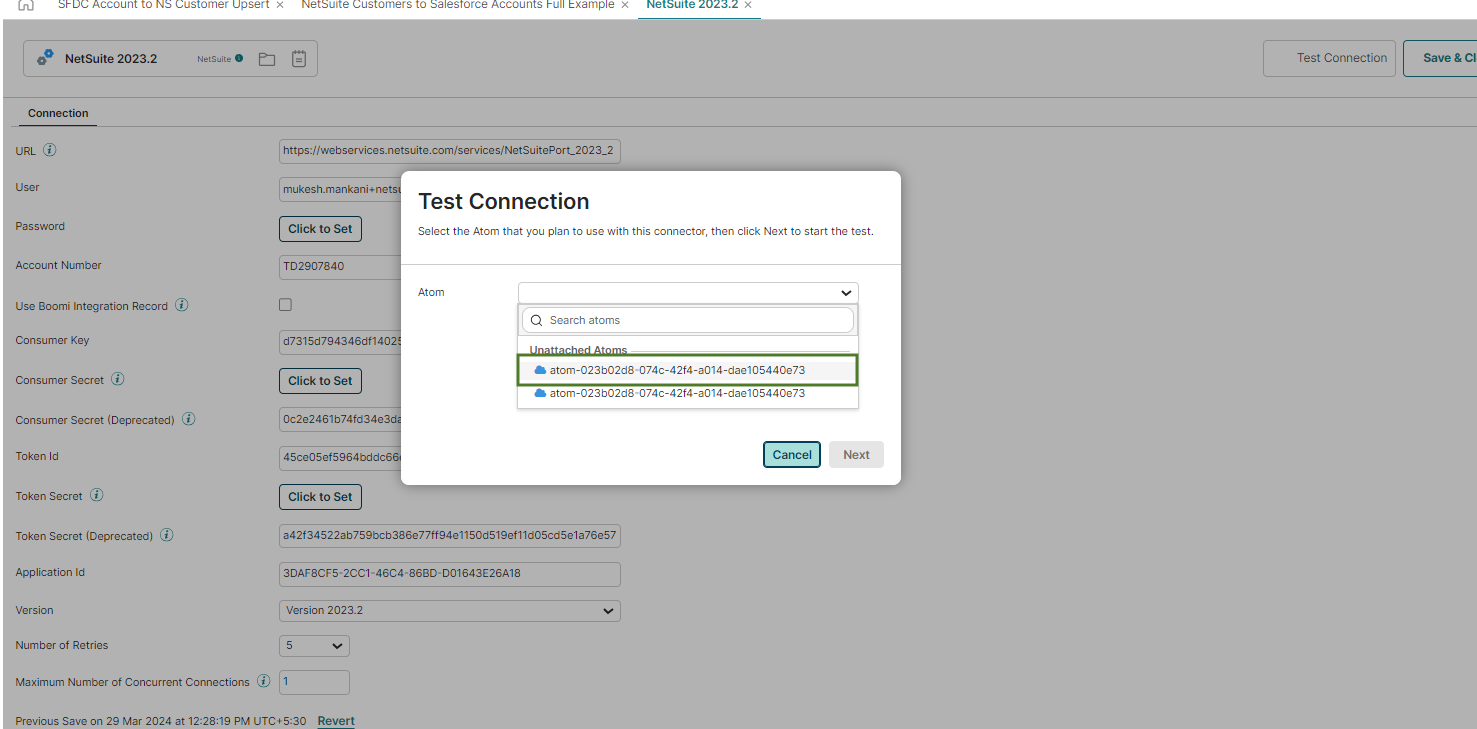
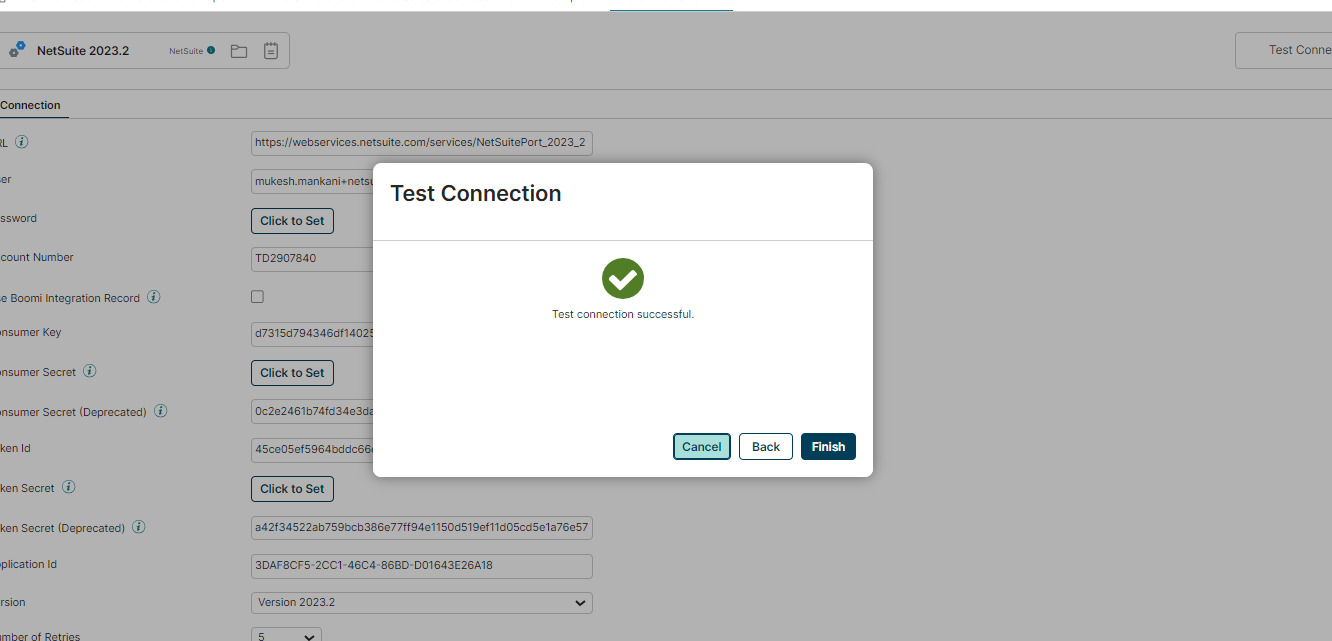
- Click the Test Connection button, and a pop-up window will appear; select Use Atoms on it, and click Next. (If not, install the Atom in your local system. You are required to install it.
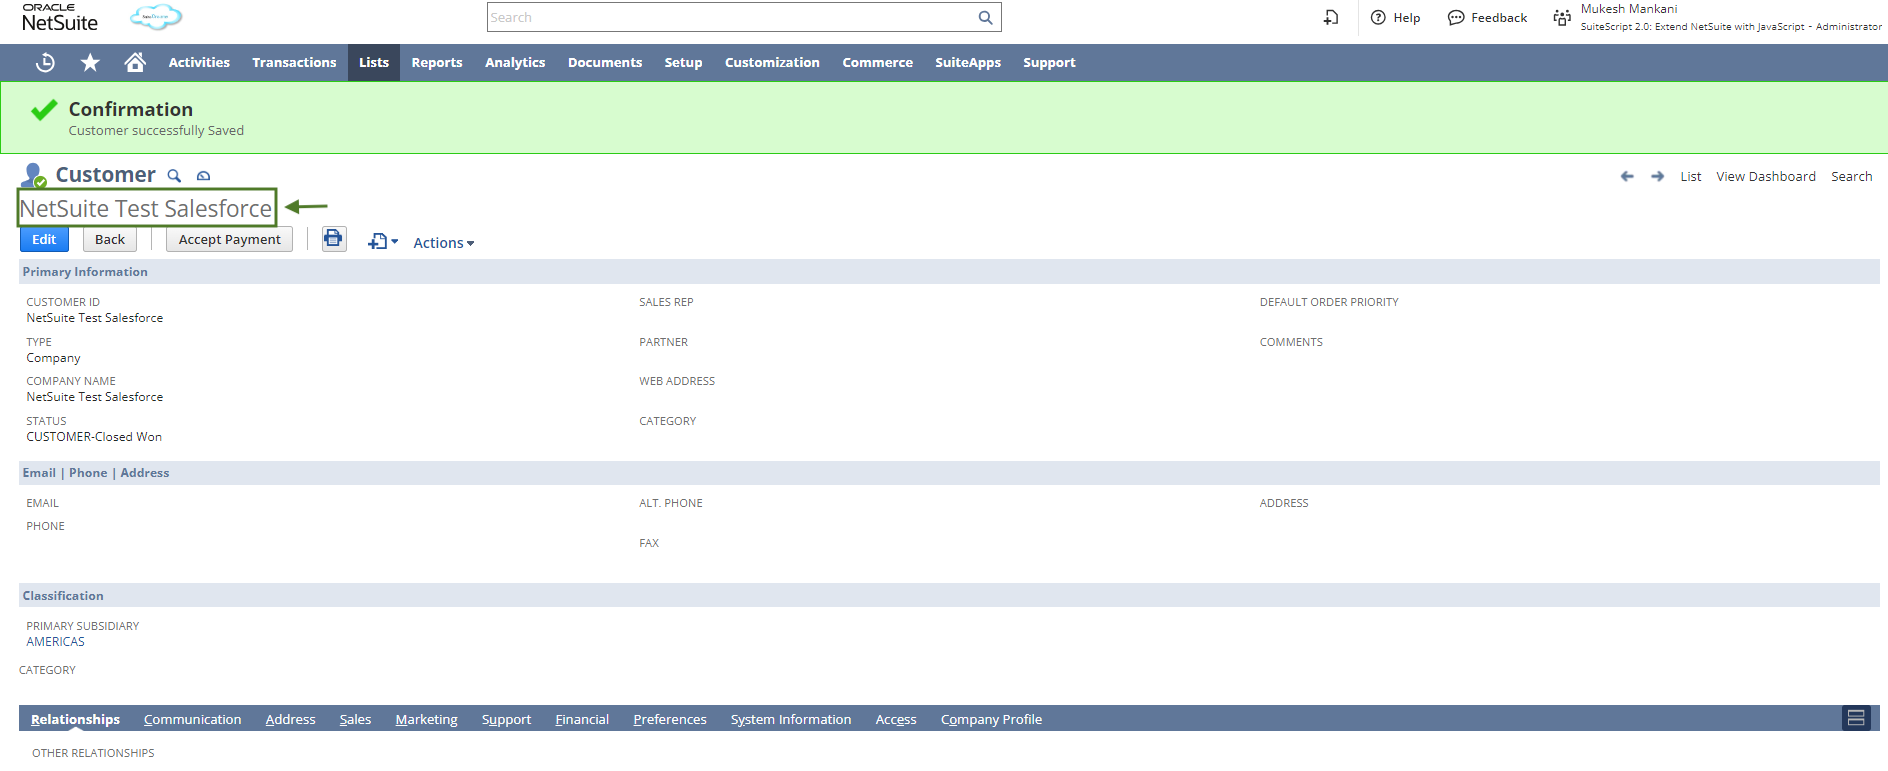
- Create a new customer in a NetSuite account. For instance, let’s take NetSuite Test Salesforce.
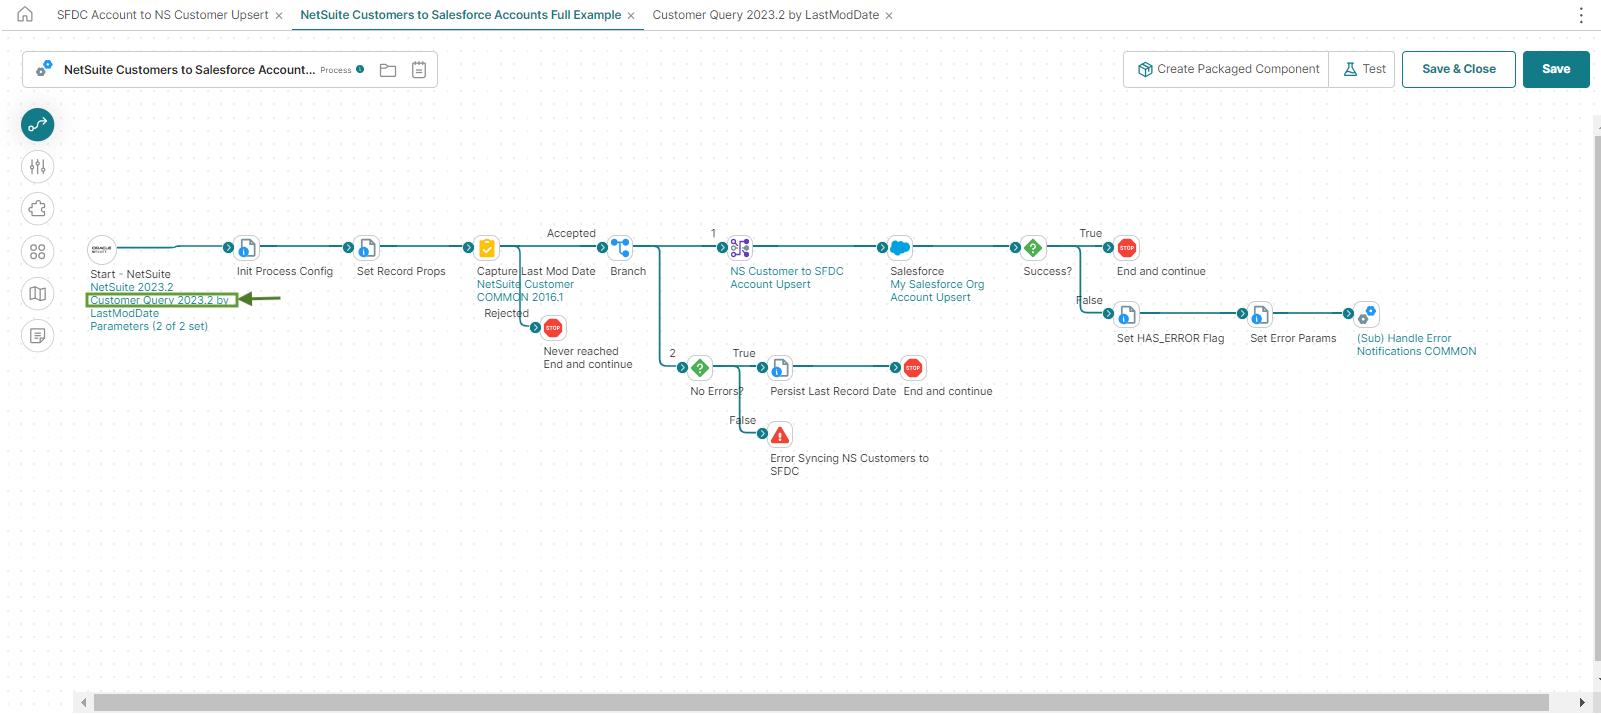
- Double Click on Customer Query 2023-it should be the last modified date.
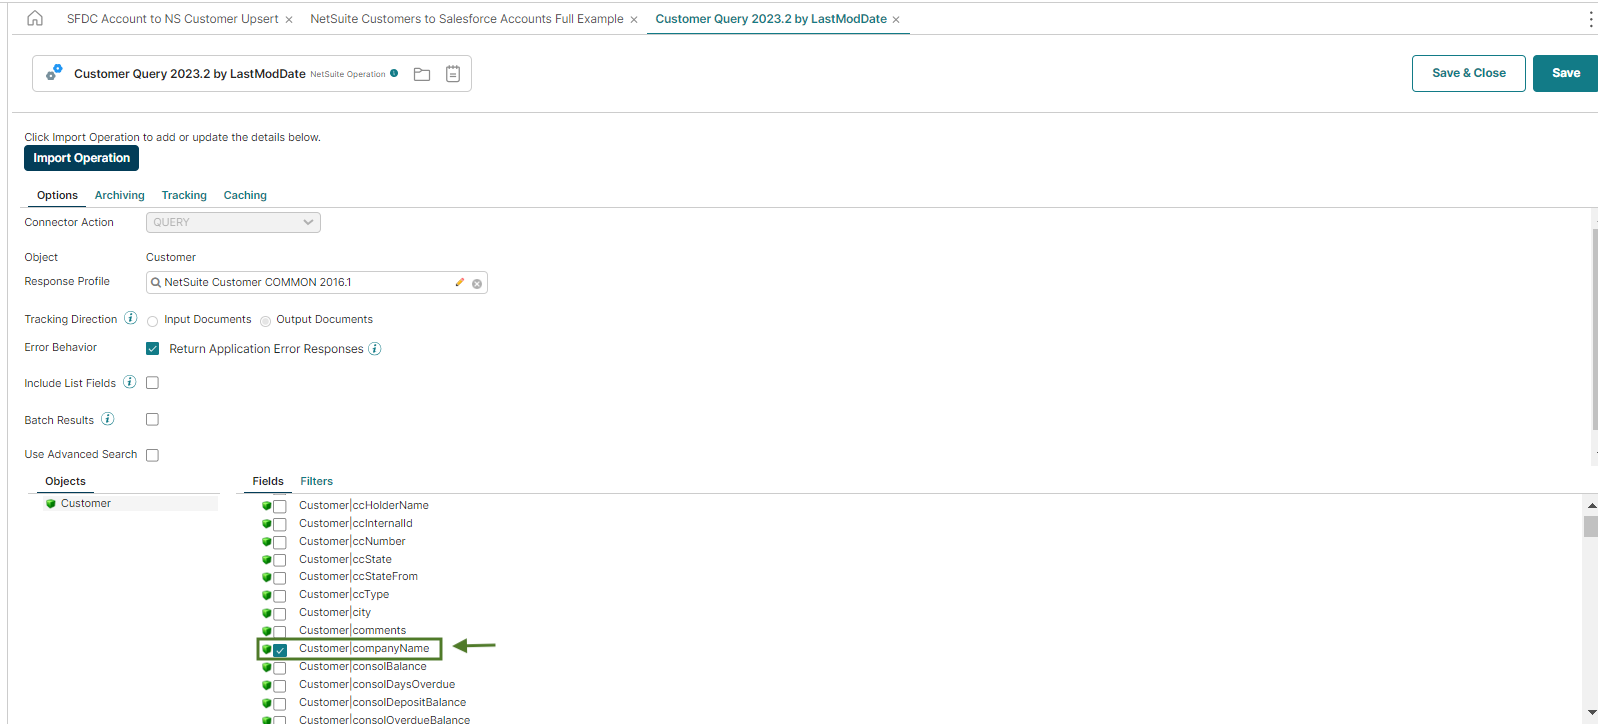
- Select the field that you want to add to the Salesforce Account.(Company Name, Internal Id)
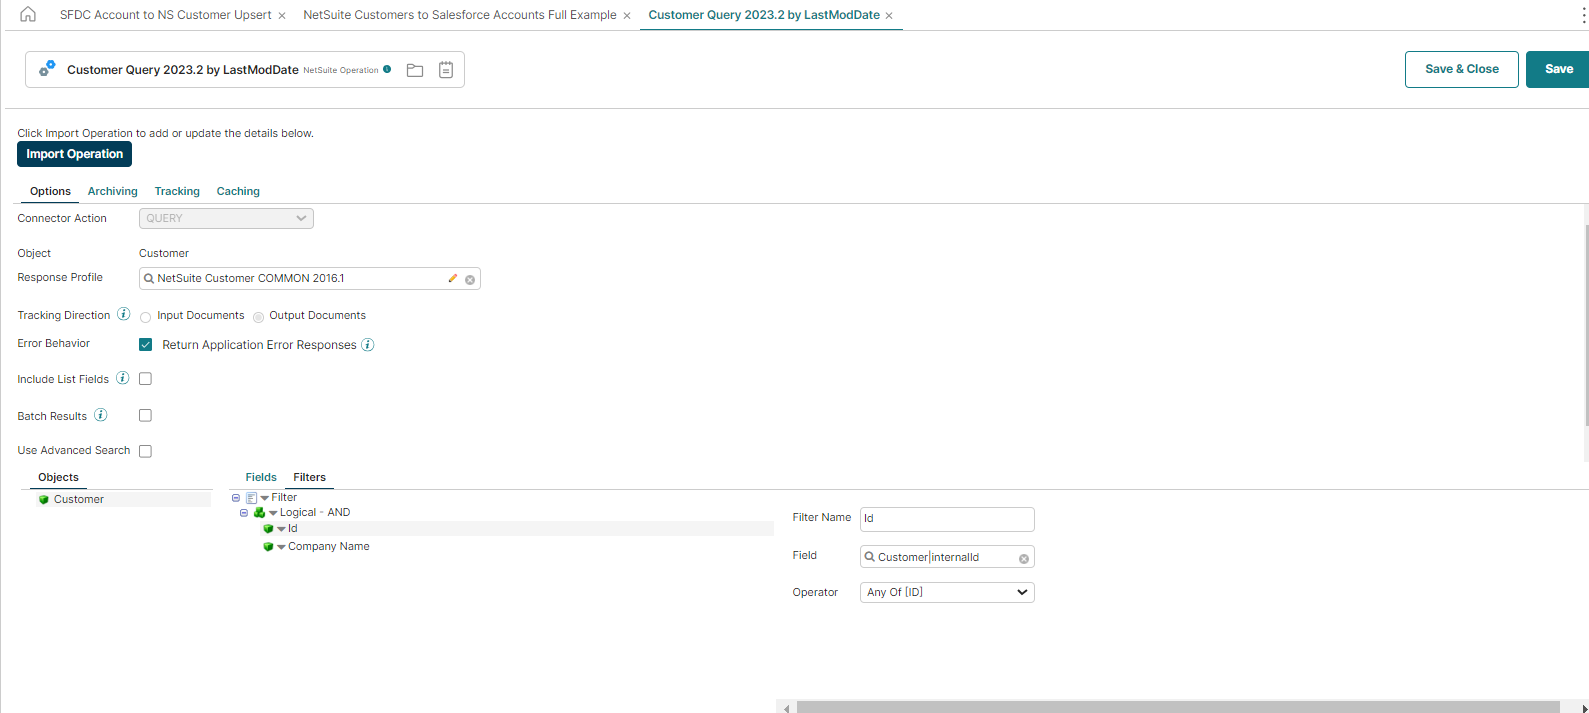
- Later, you need to put on the Filter (the Internal ID of the NetSuite customer) and click the operator for the Salesforce to NetSuite integration.
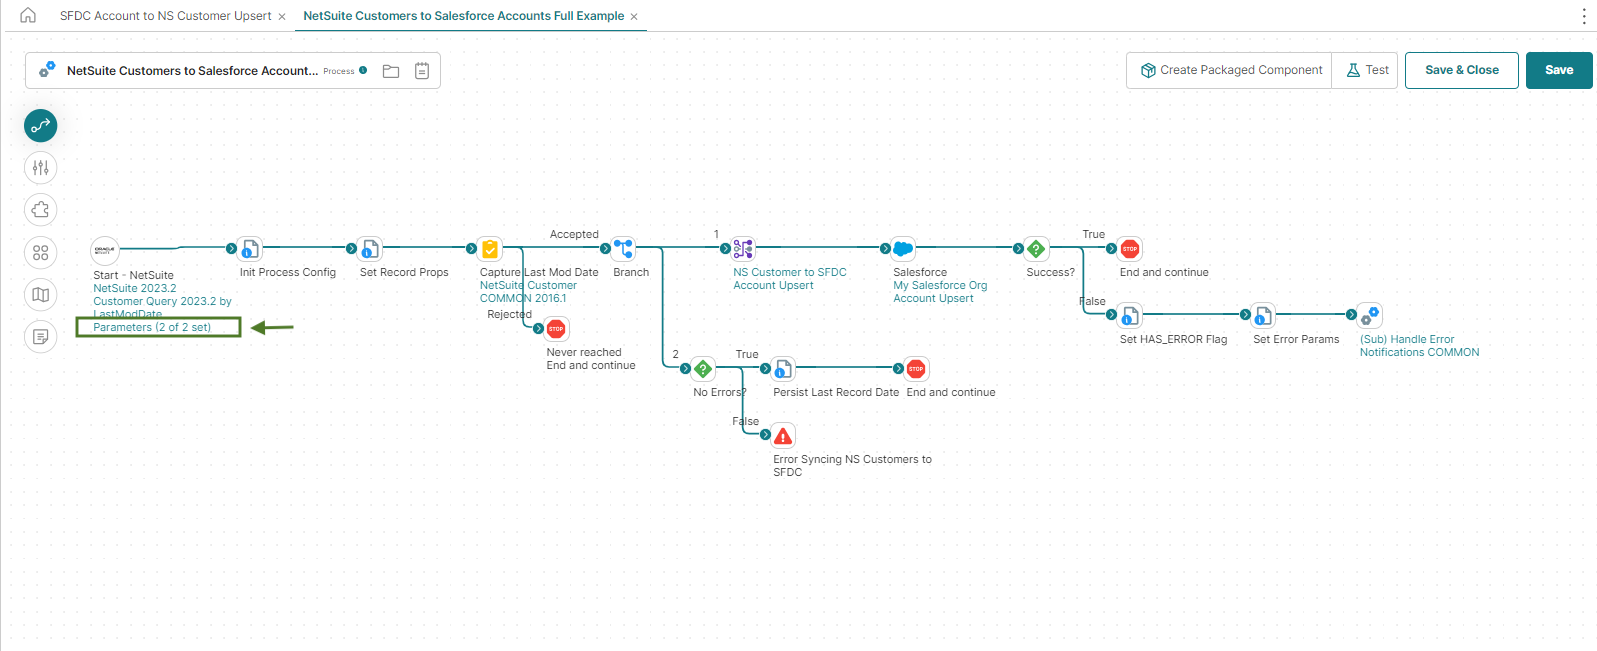
- Next, you need to double-click on the selected parameters.
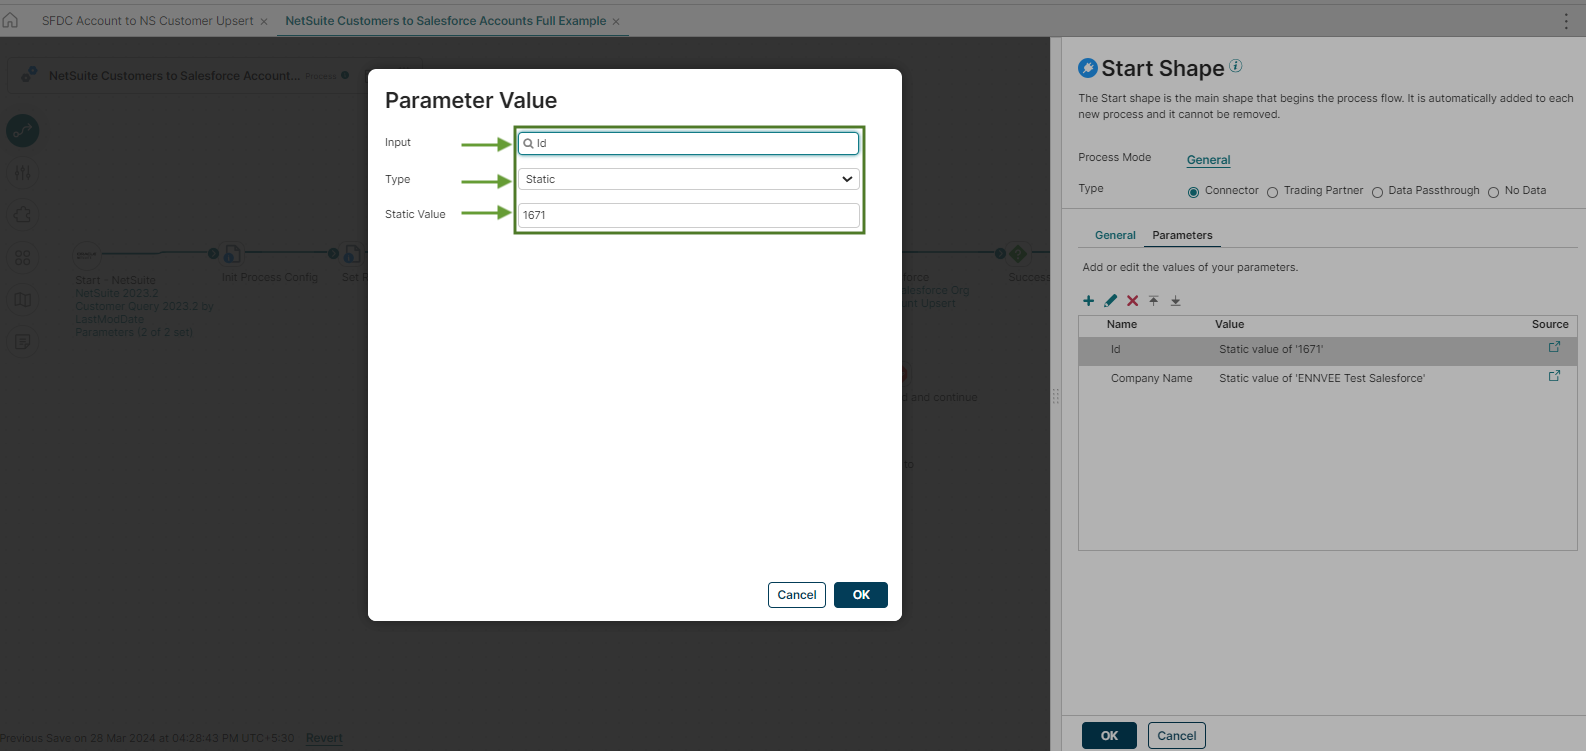
- Choose the parameter, the Internal ID of the NetSuite customer, and next, add the parameter value as per your requirement.
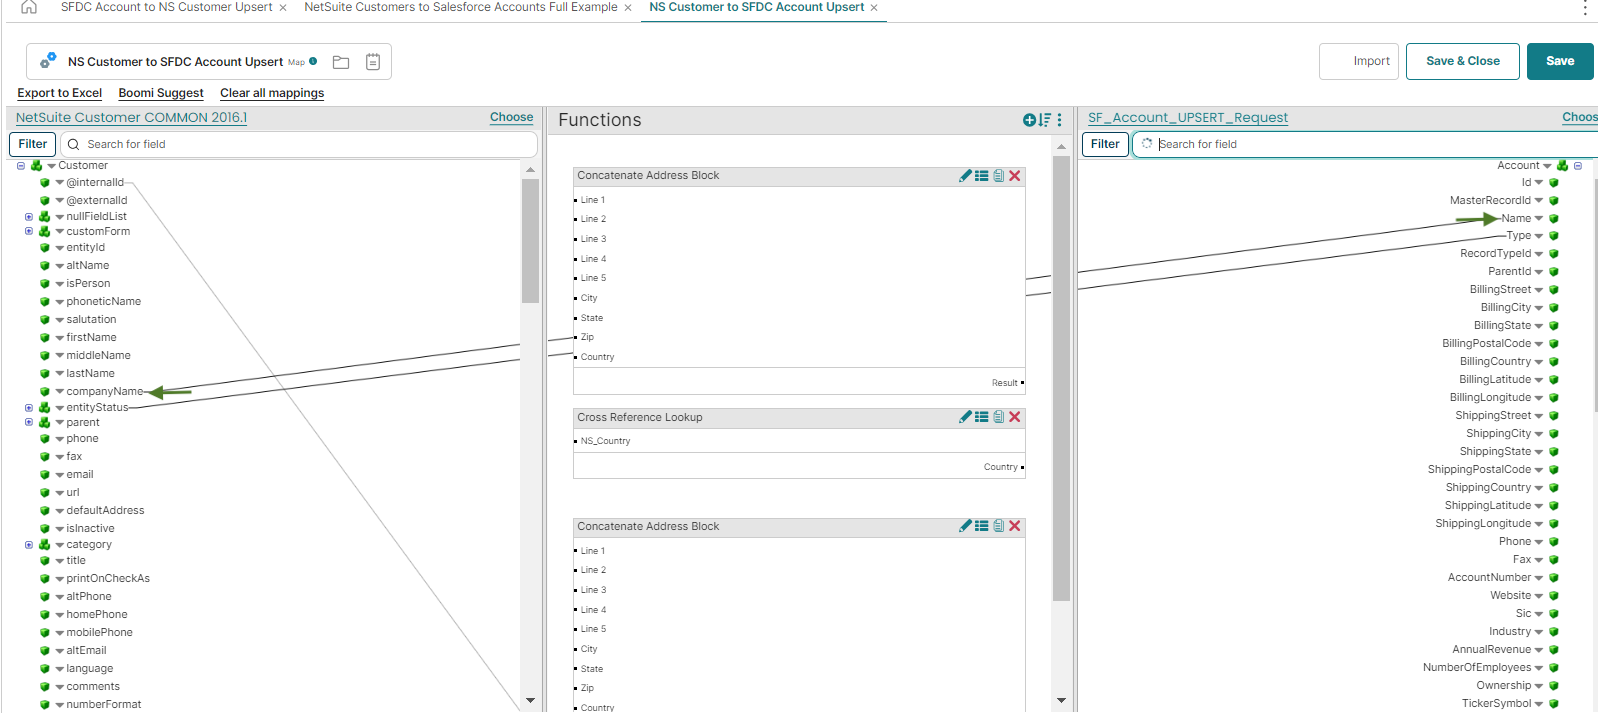
Step 4 – NetSuite customer fields with Salesforce Account fields Mapping
- You need to click twice on NS Customers to SFDC Account Upser for fields.
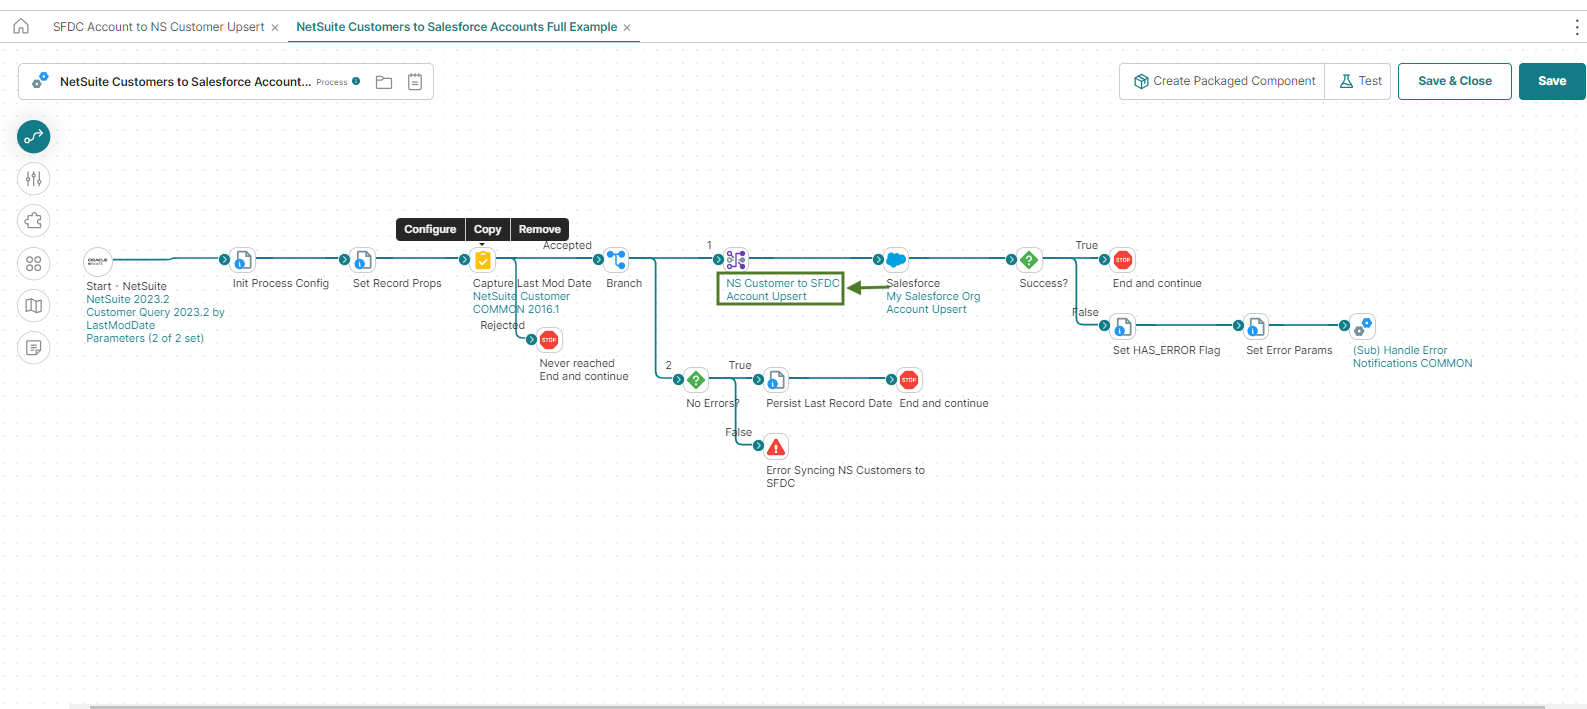
- Select the Account upsert data (which is mapping data– NetSuite customer fields with Salesforce Account fields).
Configure Salesforce Credential
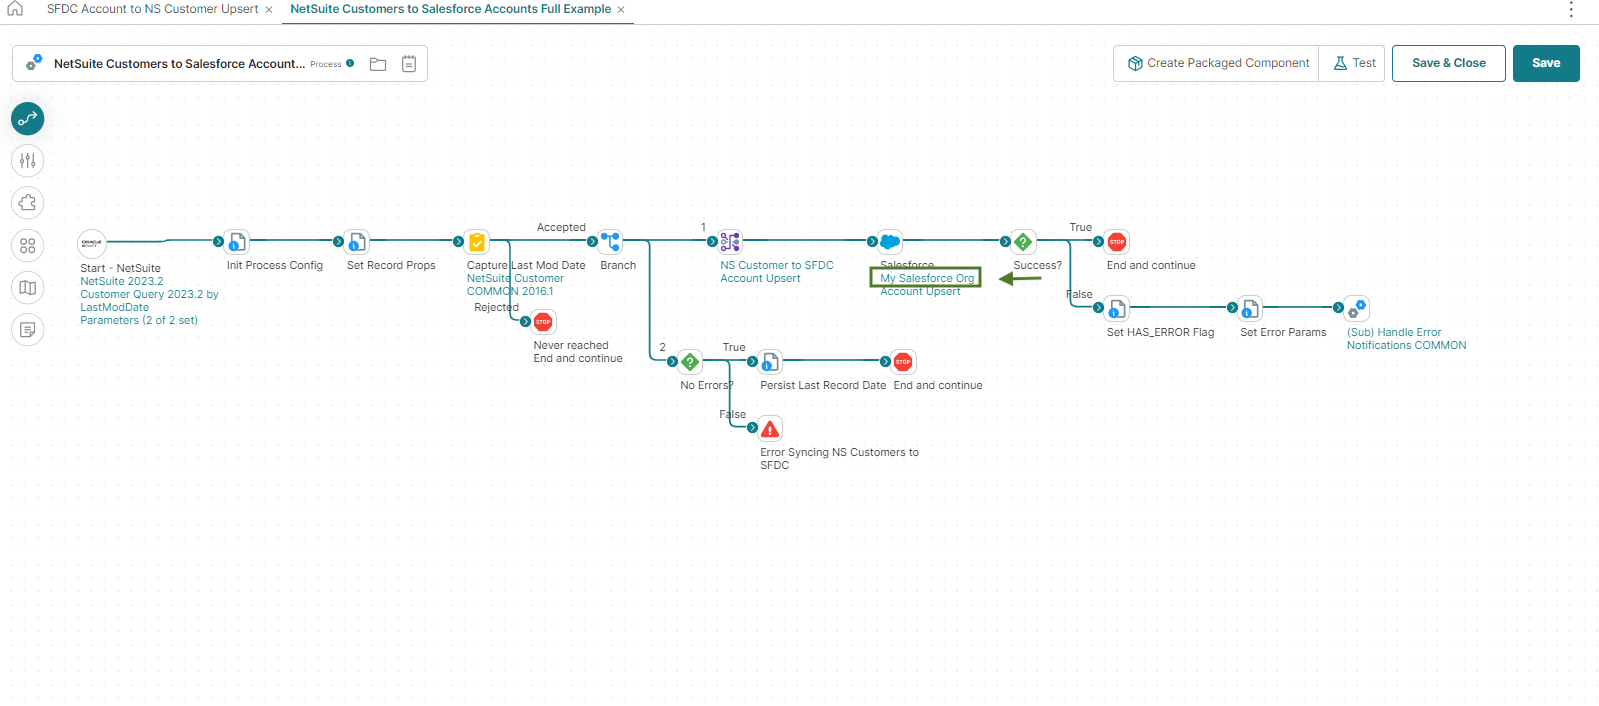
- You must double-click on “My Salesforce Org.”
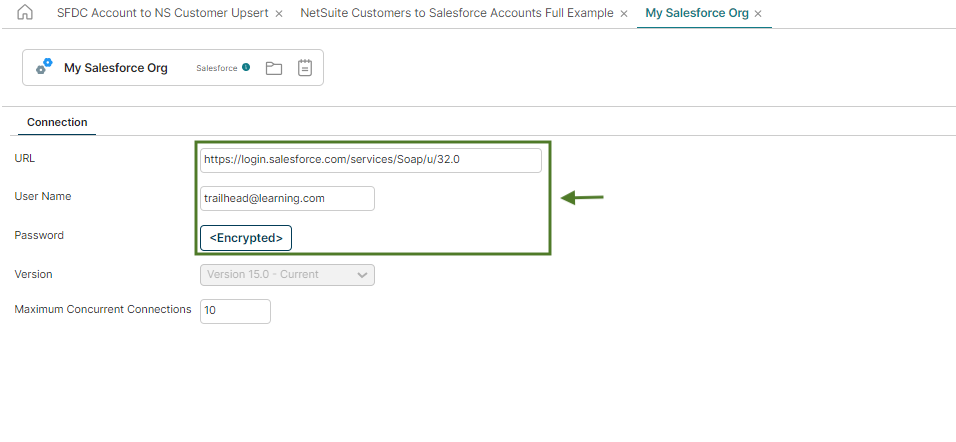
- Enter Salesforce credentials, such as username and password, and later click on Save.
Test your Data
- Click Save and test the data.
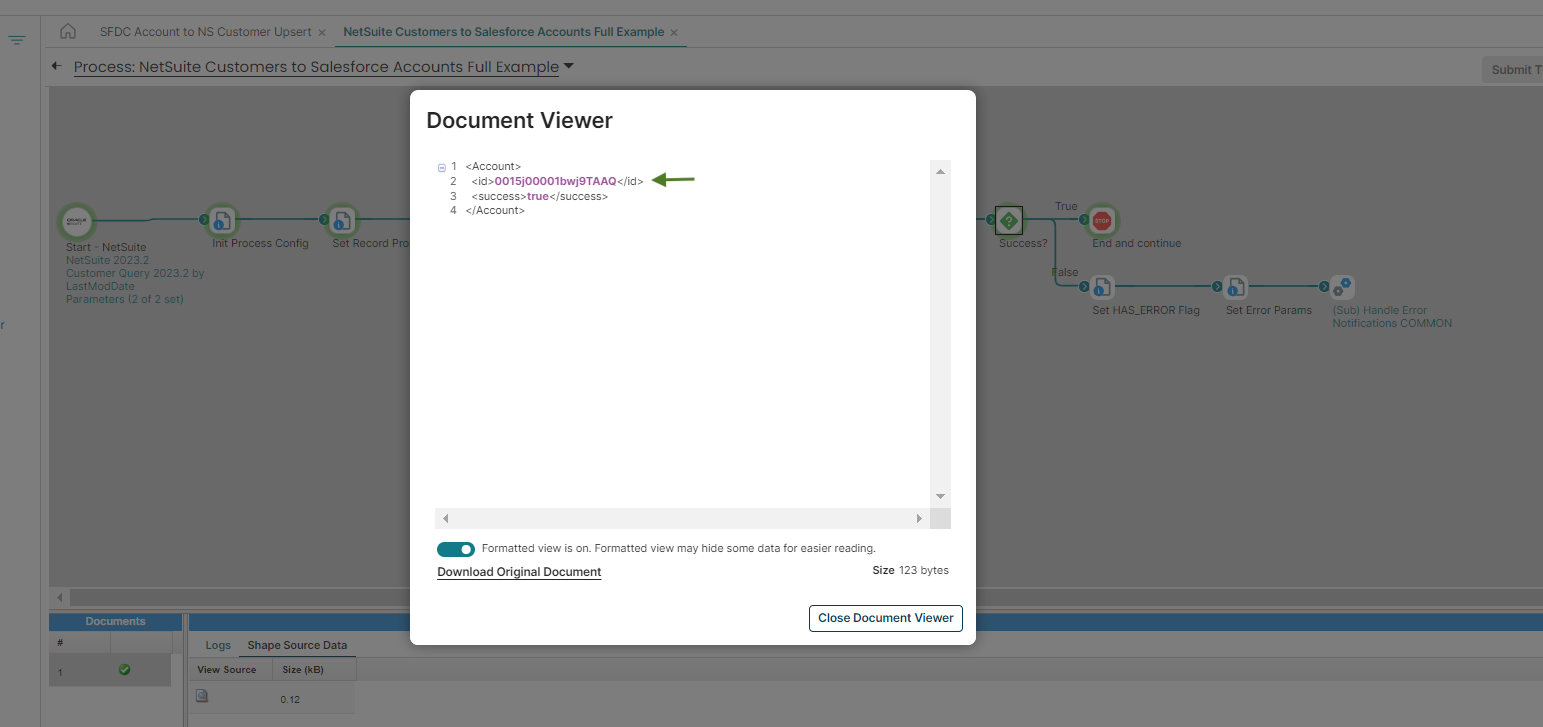
- Open the Salesforce account and copy ID from log then check the data. Hence, that’s how you implement Salesforce to NetSuite integration using Boomi.
