SyncQ: Integrate QuickBooks and Salesforce

Table Of Content
Overview
The SyncQ guide is a comprehensive resource crafted to assist users in the installation, configuration, and effective utilization of this financial integration tool. Designed to simplify the integration between QuickBooks and Salesforce, the guide aims to help users with a step-by-step walkthrough of the entire process.
Entity Relationship Diagram for SyncQ
Below is an Entity Relationship Diagram (ERD) to visualize the objects and data flow from Salesforce to QuickBooks via SyncQ.
Installation
- Please navigate to the AppExchange, search for QuickBooks Online Advanced Automation by SyncQ, and click on Get it Now to begin the installation process.

- Follow the steps requested by AppExchange to install.
- After installation, determine which users can access it based on your specific requirements and grant all the third-party permissions for SyncQ.
Note: SyncQ is compatible with Unlimited, Enterprise, Performance, and Professional editions of Salesforce (with API Enabled). Group edition is supported with API functionality. SyncQ does not support Essential and Developer editions.
Configuration
Step 1 – Create a Connected App
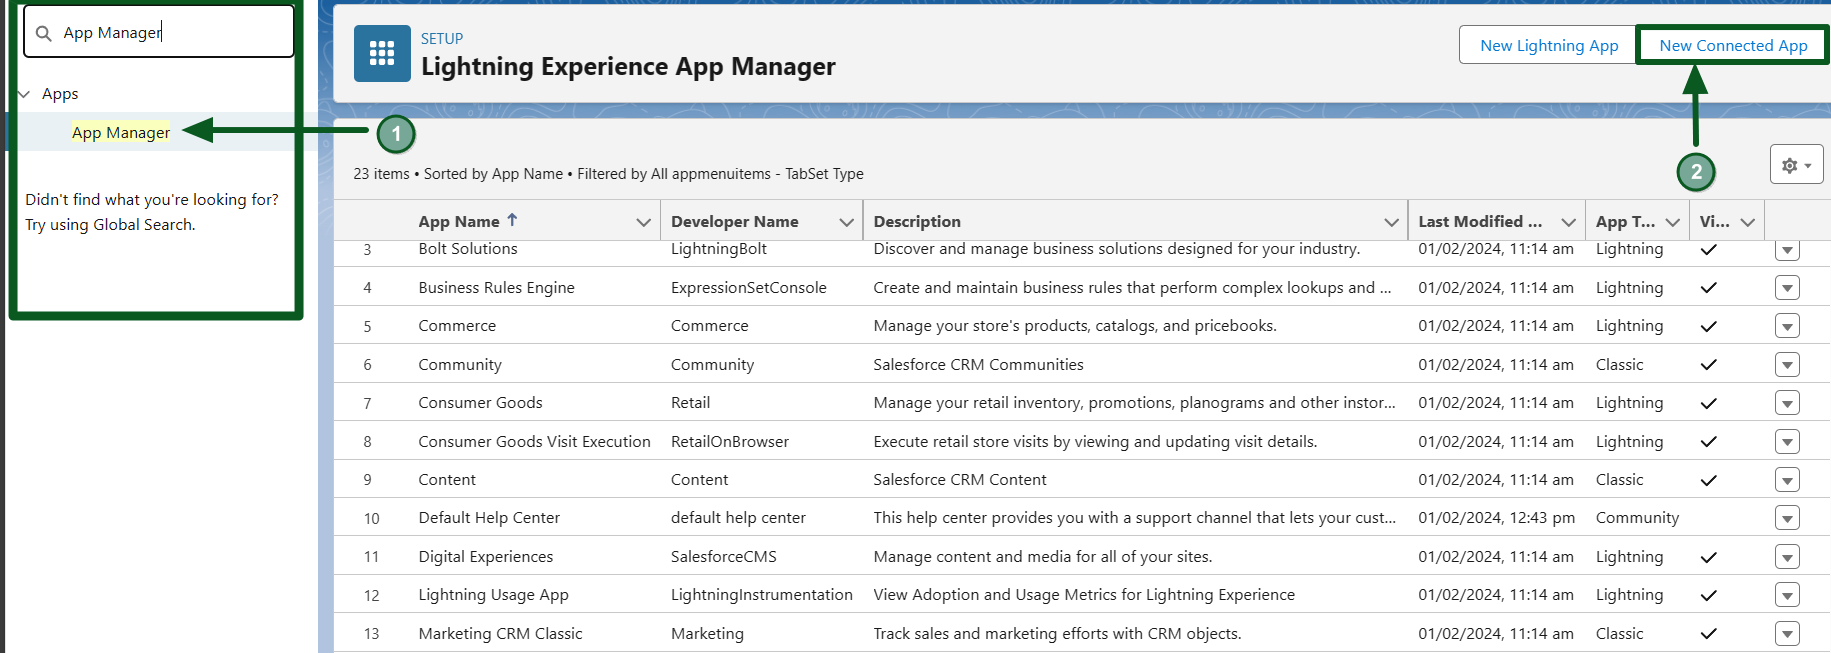
- Access Setup and navigate to Quick Find and search for the App Manager.
- Click on the App Manager.
- Click on New Connected App in the Lightning Experience App Manager.

- Fill in the details of the New Connected App:
- Name: SyncQSFLogin.
- API Name : SyncQSFLogin.
- Contact Email: Your EMAIL ID.
- Enable OAuth Settings: Tick mark it.
- Callback URL: will be available in the next step, till then, enter https://www.salesforce.com
- Selected OAuth Scopes:
- Select “Access and Manage your data (api),
- Full Access (full),
- Perform requests on your behalf at any time (refresh_token, offline_access)
- Select “Access and Manage your data (api),
- Name: SyncQSFLogin.
- Click Save, followed by Continue. This action will generate a Consumer Key and Consumer Secret.
Note: Please refrain from closing this window or browser tab as we’ll need to return to update some fields later. Proceed forward or backward as needed.
Step 2 – Create Auth Provider
- Open a new tab and navigate to Setup and search for Auth. Providers in Quick Find.
- Click on New.

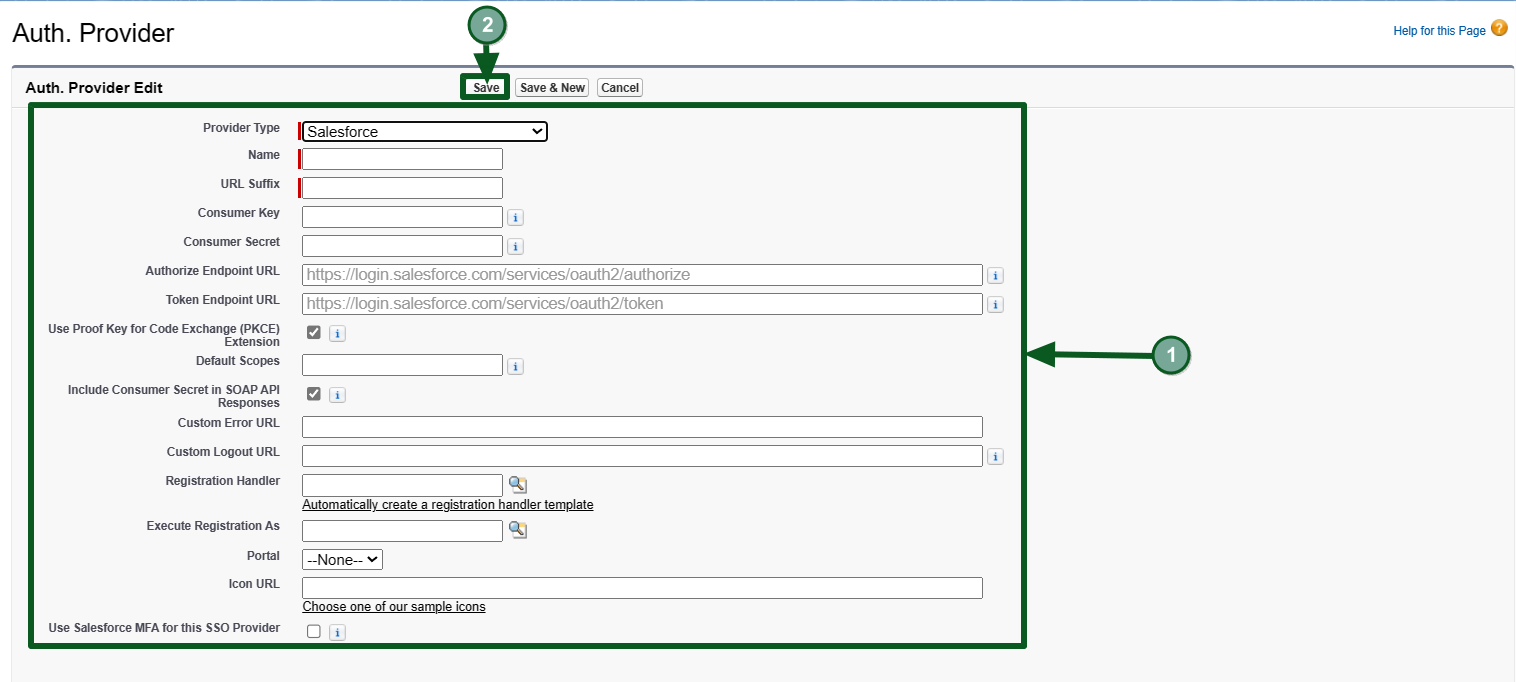
- Select Provider Type as Salesforce and Click on Save.
- Fill in the details of the Auth Provider:
- Name: SyncQSFAuthorization.
- URL Suffix: SyncQSFAuthorization.
- Consumer Key: Copy from the previous tab containing the key.
- Consumer Secret: Copy from the previous tab containing the secret.
- Default Scopes: refresh_token full.
- Registration Handler: Click on “Automatically create a registration handler template”.
- Execute Registration as Select Salesforce (admin), this user will log in to authorize the connected app.
- Name: SyncQSFAuthorization.

- Click Save on Connected App.
- This will create a few Salesforce Configuration URLs. Copy the callback URL and paste it into the callback URL section in the Connected App.
Step 3 – Create Named Credential
- Open a new tab and navigate to Setup and search for Named Credentials in Quick Find.
- Click on the dropdown and then proceed to Click on New Legacy.

- Fill in the details of the Named Credentials:
- Name: LQ_SFDC.
- URL: Paste the URL from My Domain.
- Identity Type: Named Principal.
- Authentication Protocol: OAuth 2.0.
- Authentication Provider: SyncQSFAuthorization.
- Scope: refresh_token full.
- Start Authentication Flow on Save: tick mark it.
- Generate Authorization Header: tick mark it.
- Allow Merge Fields in HTTP Header: tick mark it.
- Allow Merge Fields in HTTP Body: tick mark it.

- After clicking on Save, Salesforce will be logged out. So you can re-login with Oauth Connected App.
Step 4 – Configure SyncQ Lightning Component
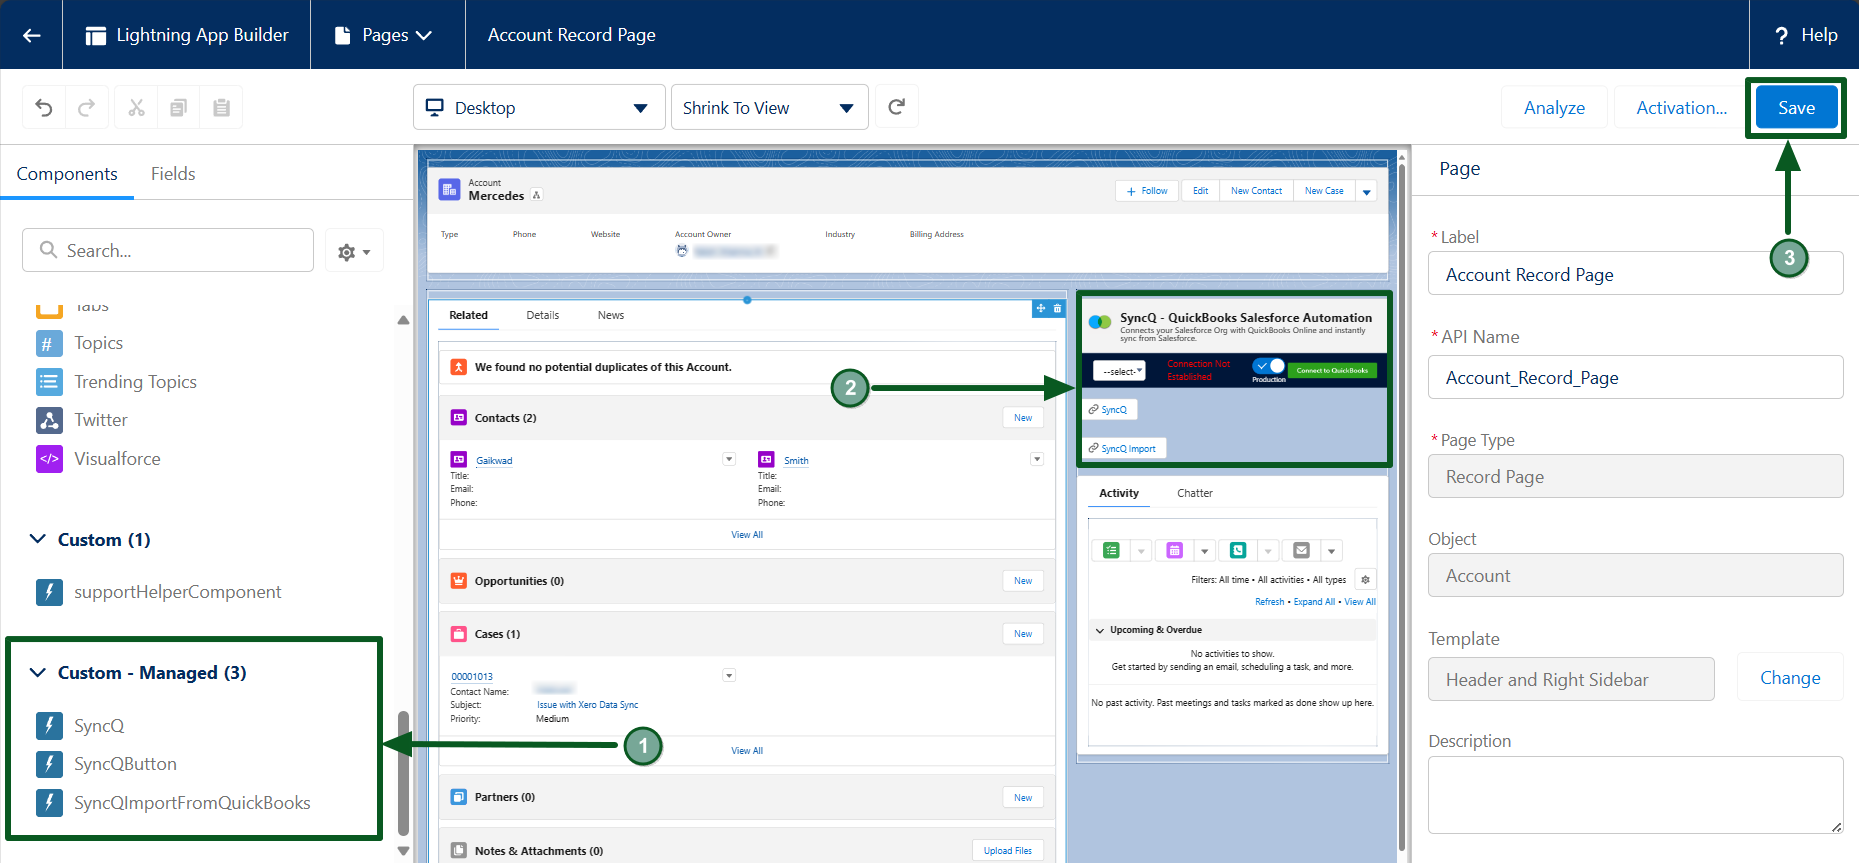
- Click on Setup and navigate to Edit Page.
- Under the Components Section, Scroll down to the Custom – Managed.
- Drag all the custom buttons to their appropriate positions on the page.
- Click on Save.

Step 5 – Connecting to QuickBooks.
- Access the App Launcher and search for SyncQ.
- Click on Connect to QuickBooks to connect your QuickBooks Company and you have the option to toggle between Sandbox and Production.

- You can add your custom mappings. For example, In the image we have mapped Salesforce Account to QuickBooks Customer and Salesforce Contact to QuickBooks Class.

Note: SyncQ offers Integration features that enable syncing between Salesforce and QuickBooks, catering specifically to QuickBooks Production Company users. As a result, the article does not demonstrate these features using Sandbox Company.
FAQs
What level of control do I have over QuickBooks Online automation with SyncQ?
With SyncQ, you have full control over what data you want to sync, when you want it synced, and the direction of the sync. This means you can customize the automation to suit your specific business needs.
Q: Does SyncQ support one-way and two-way sync between QuickBooks Online and Salesforce?
Yes, SyncQ supports both one-way and two-way sync. This means you can sync data from QuickBooks Online to another platform, from Salesforce to QuickBooks Online, or vice versa.

